
Understanding Pricing set up on JRNY Ops
In JRNY Ops, pricing is built across three layers, with each layer building on the one before it:
- Parameters – defines the duration and mileage values used for pricing.
- Matrices – combines those parameters to create the pricing structure.
- Asset Pricing – applies the relevant price matrix to an asset.
Understanding these three layers will help you see how pricing is configured and how the final price is applied to an asset.
Layer 1: Parameters
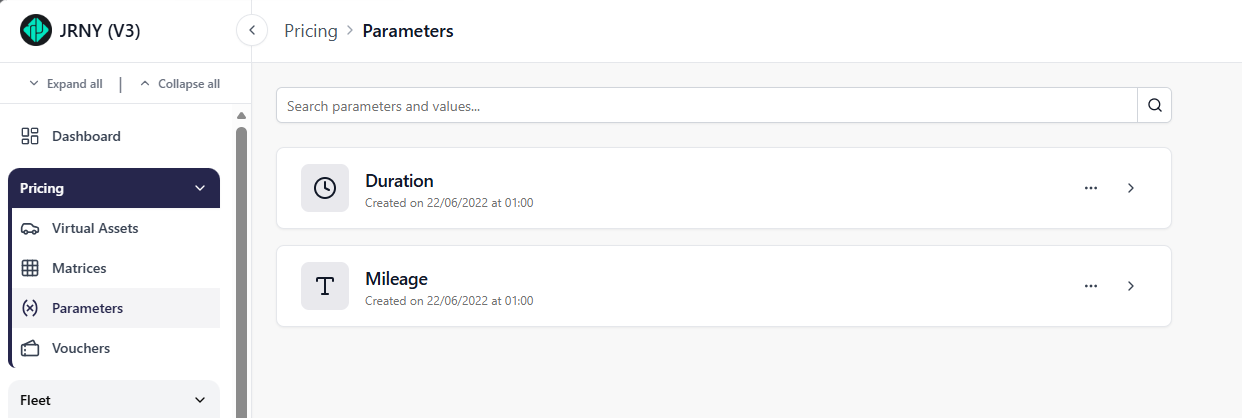
Parameters are the foundation of the pricing structure. They define the duration and mileage values that can be used when creating a price matrix.
The units available depend on the client's business model. Duration can be measured in weeks or months, while mileage can be measured in miles or kilometres.
Both parameters can be expanded by clicking the > arrow.
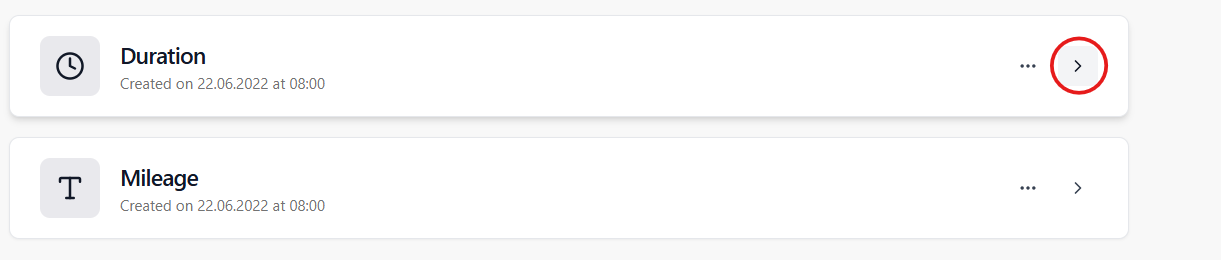
To add a duration click on the '>' icon and a dropdown with existing duration units created previously will appear. Click + Add value
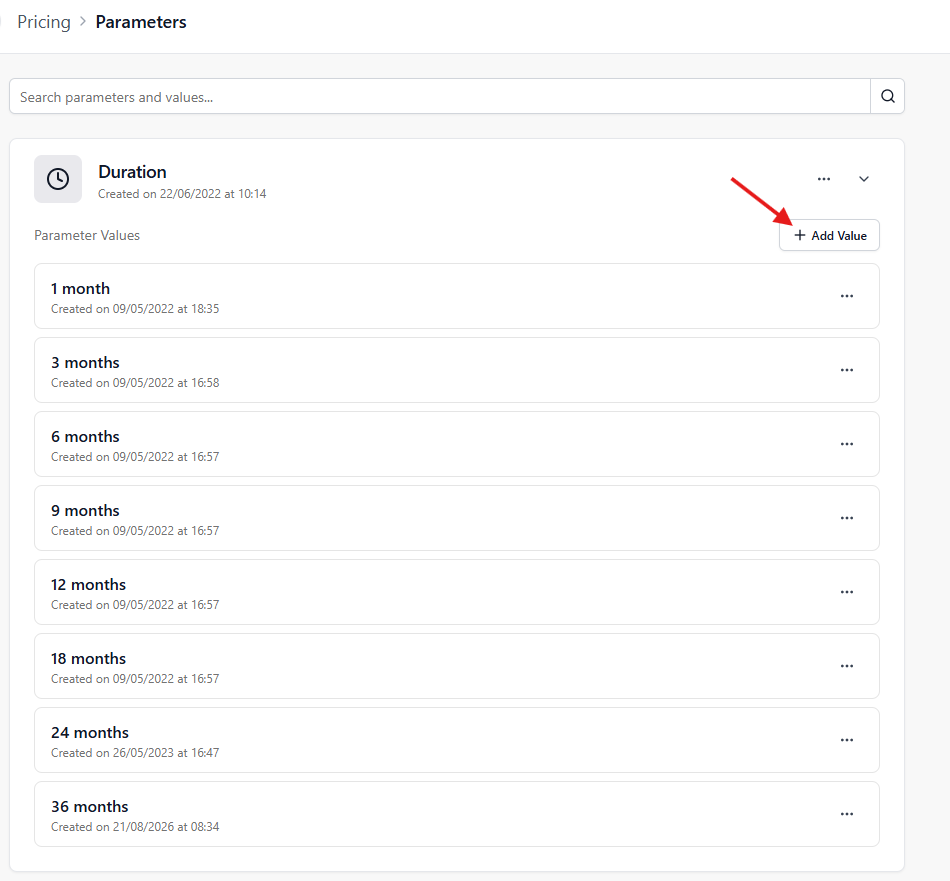
Enter the value and pick the unit from the Duration Dropdown ad Click Save
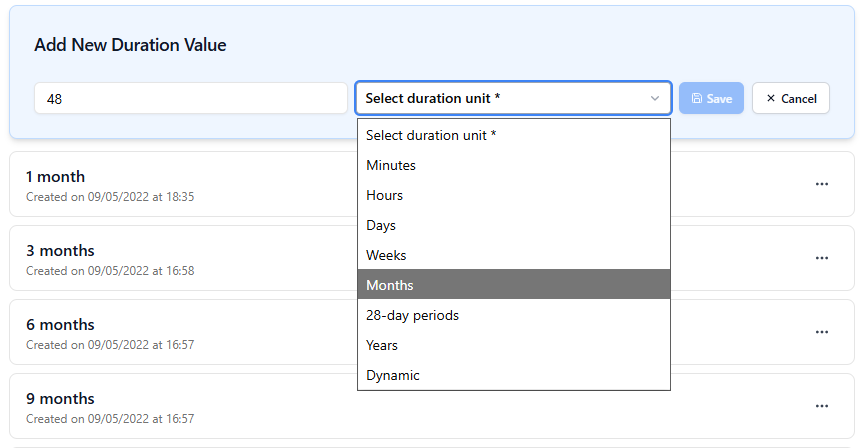
A green toast notification appears on the corner of the screen, confirming this addition:
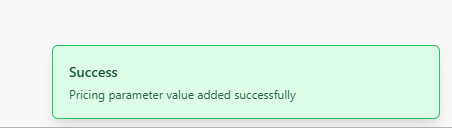
The same steps apply to adding a mileage parameter.
Layer 2: Matrices
The second layer of Pricing involves creating matrix/ matrices using the parameters added.
A pricing matrix is configured by the TJ team for the client. A price matrix is a tabular structure of duration & mileage parameters created in Layer 1.
For example:
| Km & duration | 2000 km | 3000 km |
|---|---|---|
| 12 months | $200 | $400 |
| 18 months | $150 | $300 |
A client may have more than one price matrix when they need completely different pricing structures for different customer segments or business requirements.
For example, a client might have one price matrix for retail customers and another for business customers or for internal staff.
Categories within a Price Matrix
Categories are used to group assets that share common characteristics or requirements.
For example, a client may use the following categories in their retailer consumer price matrix:
- Tier 1 – higher-priced vehicles
- Tier 2 – mid-priced vehicles
- Tier 3 – lower-priced vehicles
Each tier can have its own pricing, with the appropriate tier determining which price is applied to the asset.
Other clients may use categories differently depending on their pricing model.
In simple terms, categories help group assets based on a commonality within a price matrix.
Understanding default pricing
Default pricing allows an Ops user to set a price that an asset can use automatically when no specific price has been set for it.
Default pricing can be configured for a category and a price matrix. This means that when an asset is assigned to a category, the relevant default price can be applied automatically.
For example, if Tier 1 is configured with a default price of $500, an asset assigned to Tier 1 can use the $500 price unless a specific price has been set for that asset.
Layer 3: Asset Pricing
Once a price matrix has been added to an asset, the pricing configured at Layer 2 is loaded onto the asset.
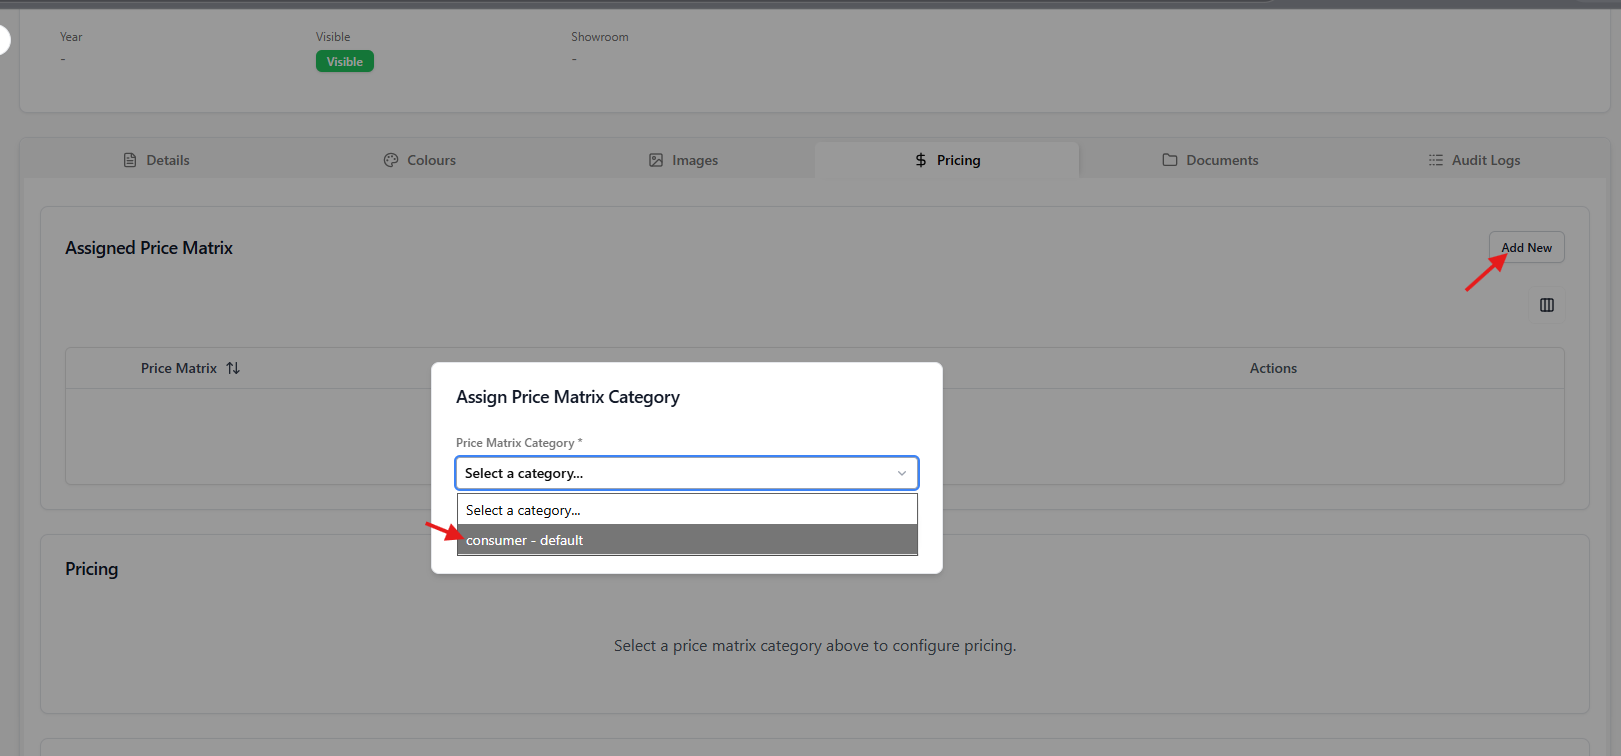
When the price matrix is first added, pricing is not yet activated. This is shown by the yellow highlighted fields.

To activate pricing, click the eye icon (View). The highlighted fields will change from yellow to white, allowing the Ops user to enter prices for the relevant duration and mileage
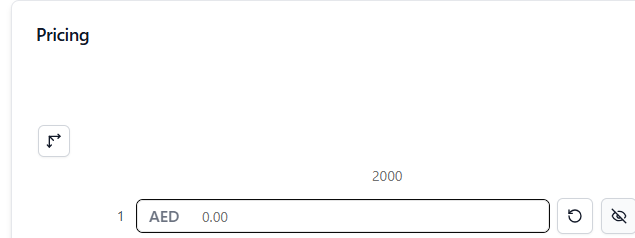
For Default pricing:
If default pricing was configured when the price matrix was created, it will also appear automatically when the price matrix is added to an asset.
Default pricing is shown with a blue highlight.
For example, if default pricing was configured for the Tier 1 category, this pricing will appear automatically when the price matrix is assigned to an asset.

To overwrite the default pricing, simply enter a new price in the blue-highlighted field. Once edited, the field will change from blue to white, indicating that the inherited default has been replaced with an asset-specific price.
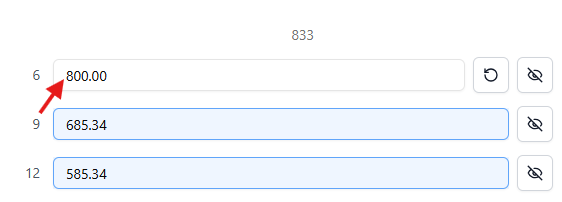
After saving, the colours make it easy to distinguish between pricing inherited from the default configuration and pricing manually entered by the Ops user.
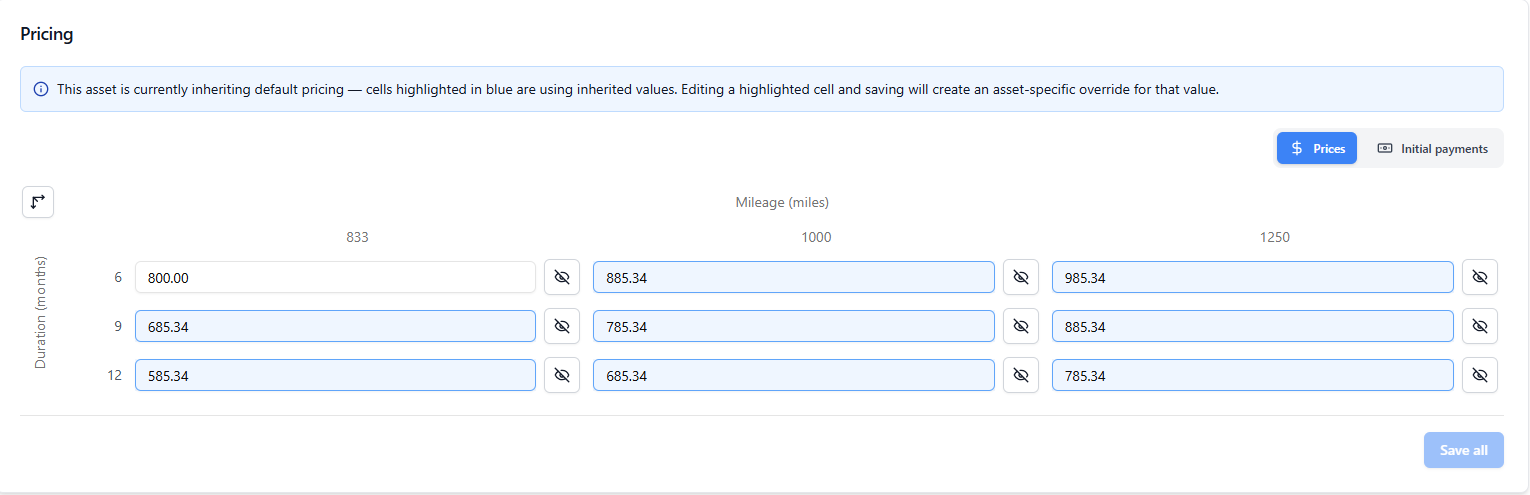
After entering or updating the asset price, make sure to click Save all to register price changes.
More information on Initial Payments and Optional Charge items will be covered in separate articles.
Article by Roshel Jose
Please note:
- The JRNY platform is constantly evolving and new features and functionalities are added all the time. We are constantly updating the Knowledge Base, but some instructions and/or images you see in these articles may vary slightly from what you can see in your own environment. Get in touch with support@tomorrowsjourney.co.uk when in doubt.
- Some features and functionalities may require configurations or additional development to work in your environment. Please speak to us if you have any questions.