
Adding Asset images on Ops
You can configure asset visuals in JRNY Ops by adding colours, angles and images to both virtual and physical assets. This helps improve how assets are displayed on the demand website.
Before you begin:
- For virtual assets, navigate to the Virtual Assets submodule in the Pricing module.
- For physical assets, navigate to the Physical Assets submodule in the Fleet module.
Steps to add Asset Images
- Navigate to the Images tab on the Asset Details page.
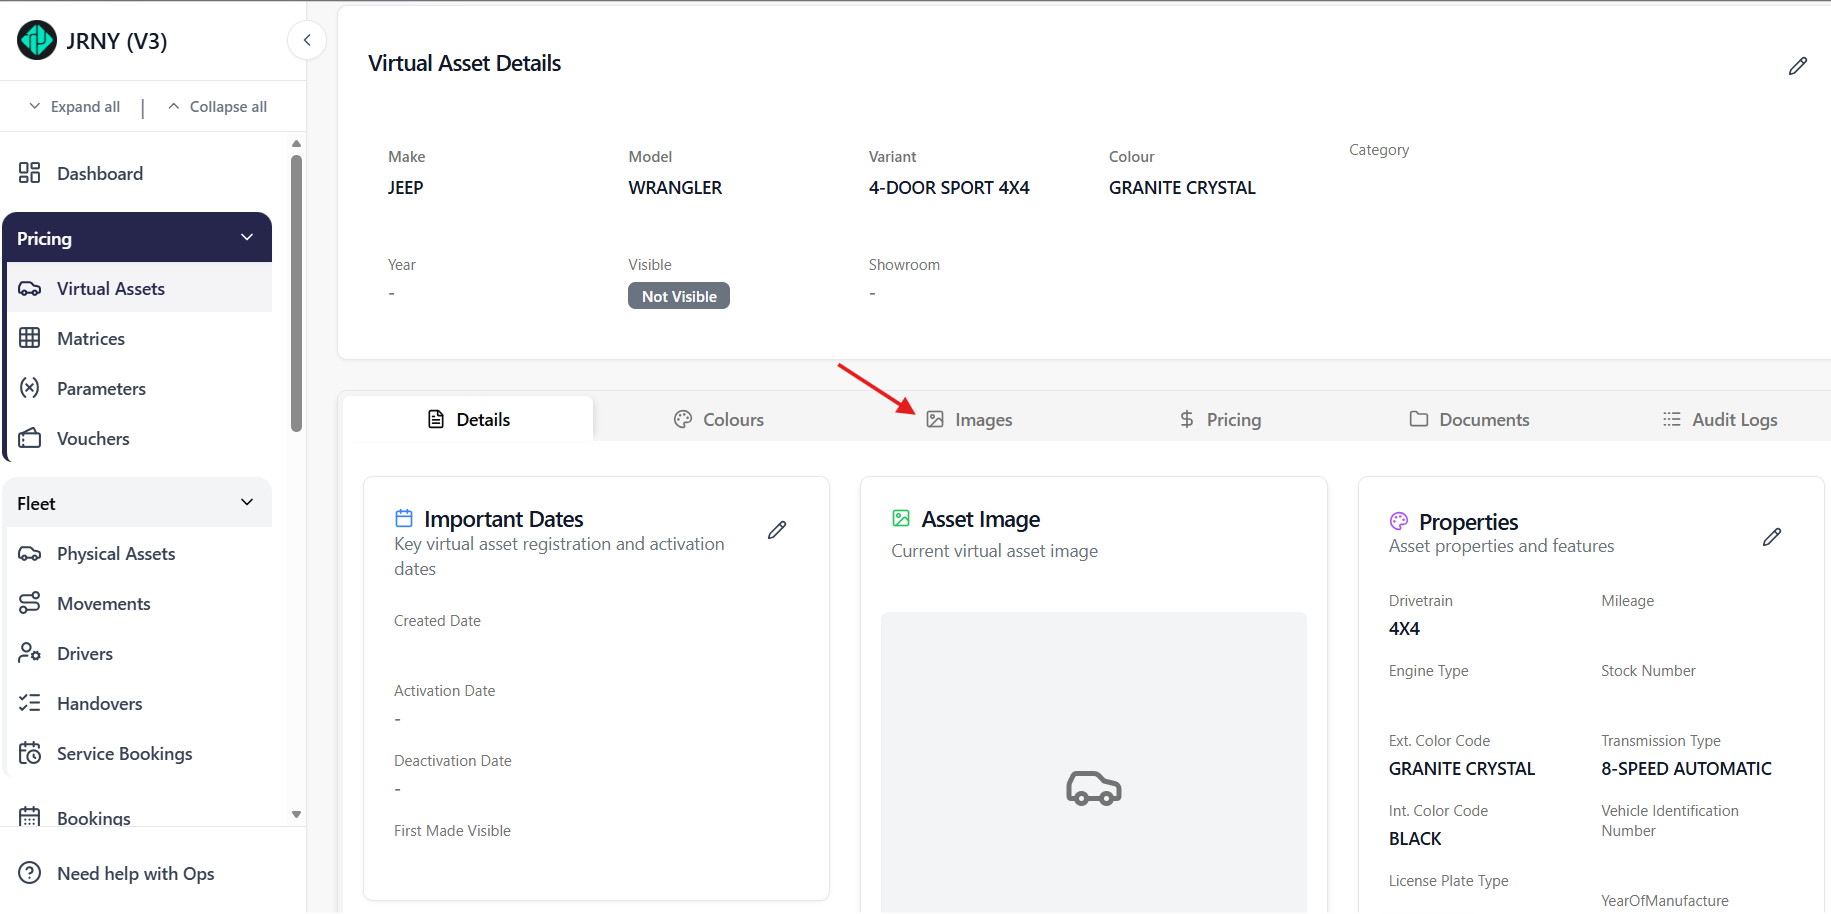
- The configuration dropdowns (Make, Model, Variant) are auto-filled based on the asset setup.
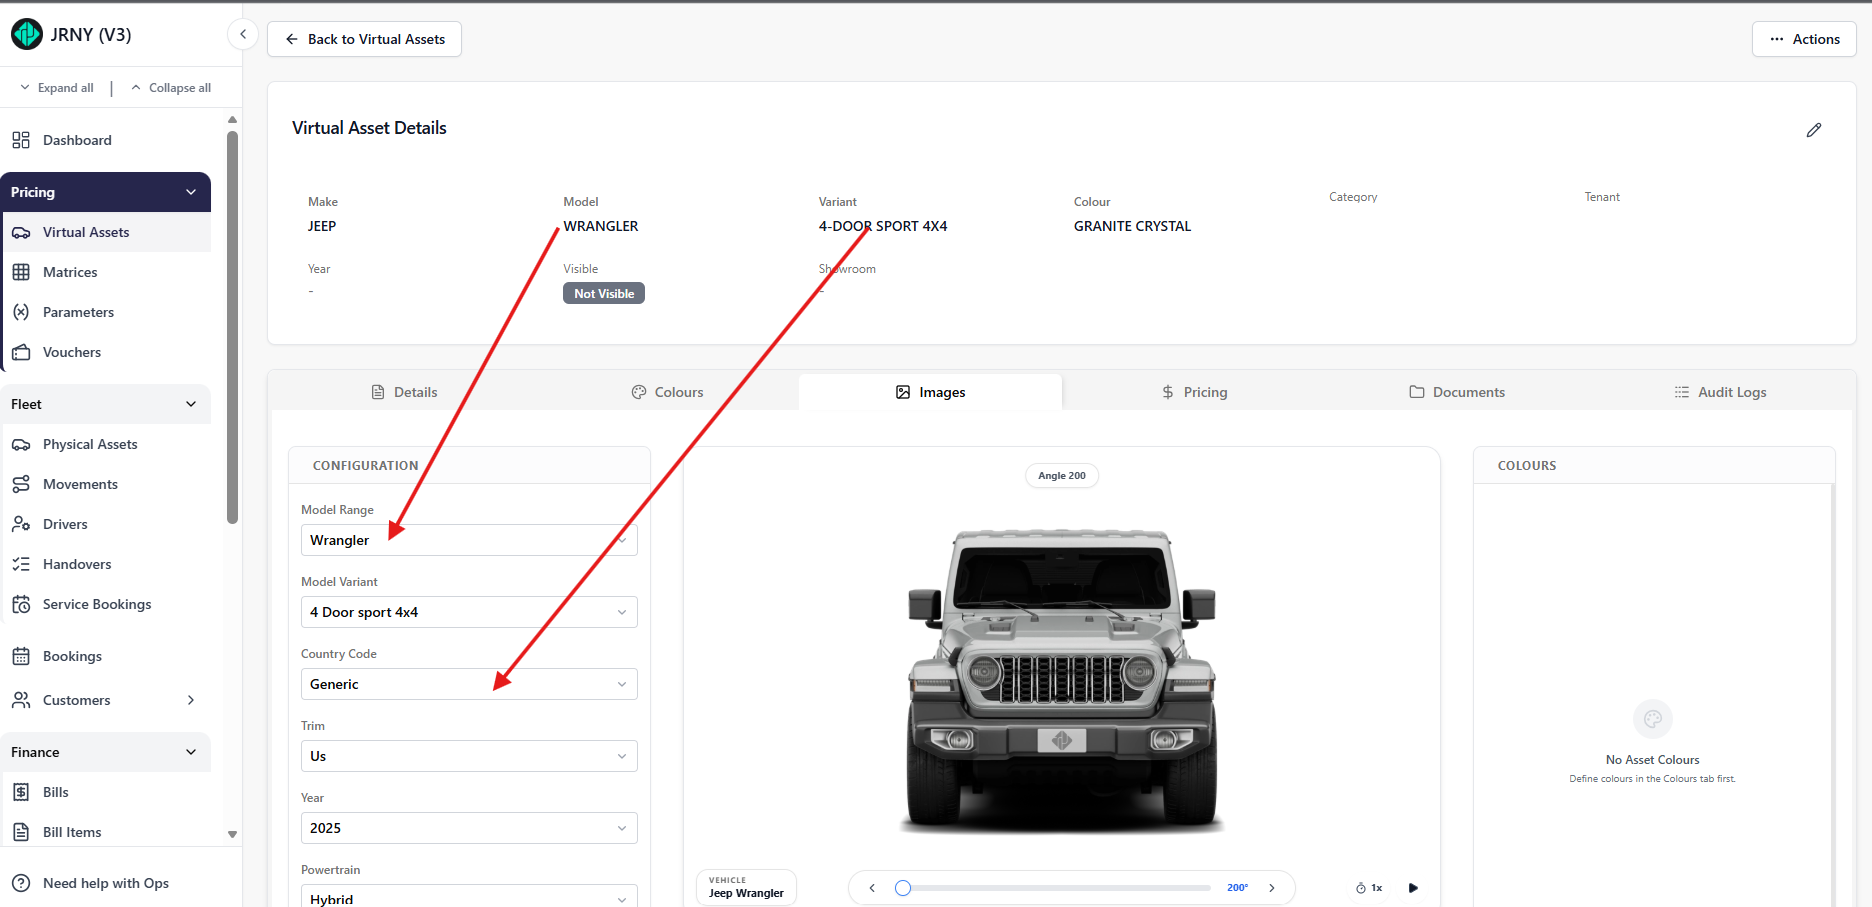
- If updates are required, edit the asset details and refresh JRNY Ops to reflect the changes, or open the dropdowns to select other options if available. The options in the dropdown show
Colour Selection
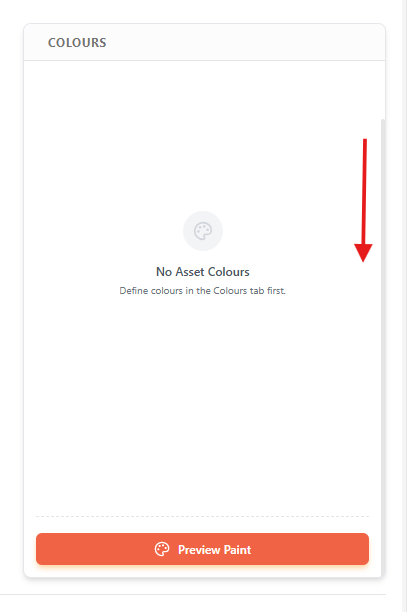
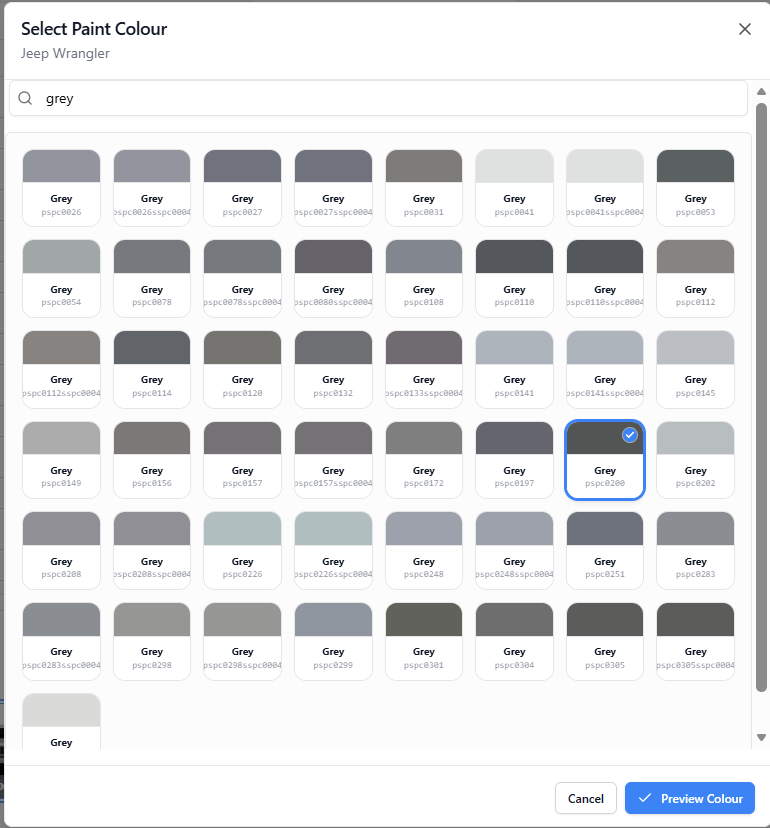
- The next step is to pick a colour for the asset. Navigate to the Colour section. There is a scroll bar on the right side - scroll down to get an orange Preview Paint button
- Click on Preview Paint to select a colour for your asset.
- From the available paint swatches, choose a colour and shade that is closest to the asset's colour. Use the search bar to narrow down your colour selection and pick the desired colour swatch.
- A blue check mark appears when a paint is picked.
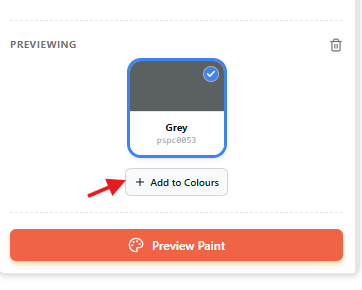
- Click on the blue Preview Colour button to apply the current colour selection to the asset preview.
- Click Add to colours to add the previewed paint swatch. A green toast notification appears on the right confirming this change.
- The colour changes are reflected in the Asset preview, the studio assets (vehicle angles), and we can see the colour swatch we've chosen. You can only choose one colour at a time here. To learn how to add multiple colours to your asset, please refer to this article: Adding multiple colours to your asset
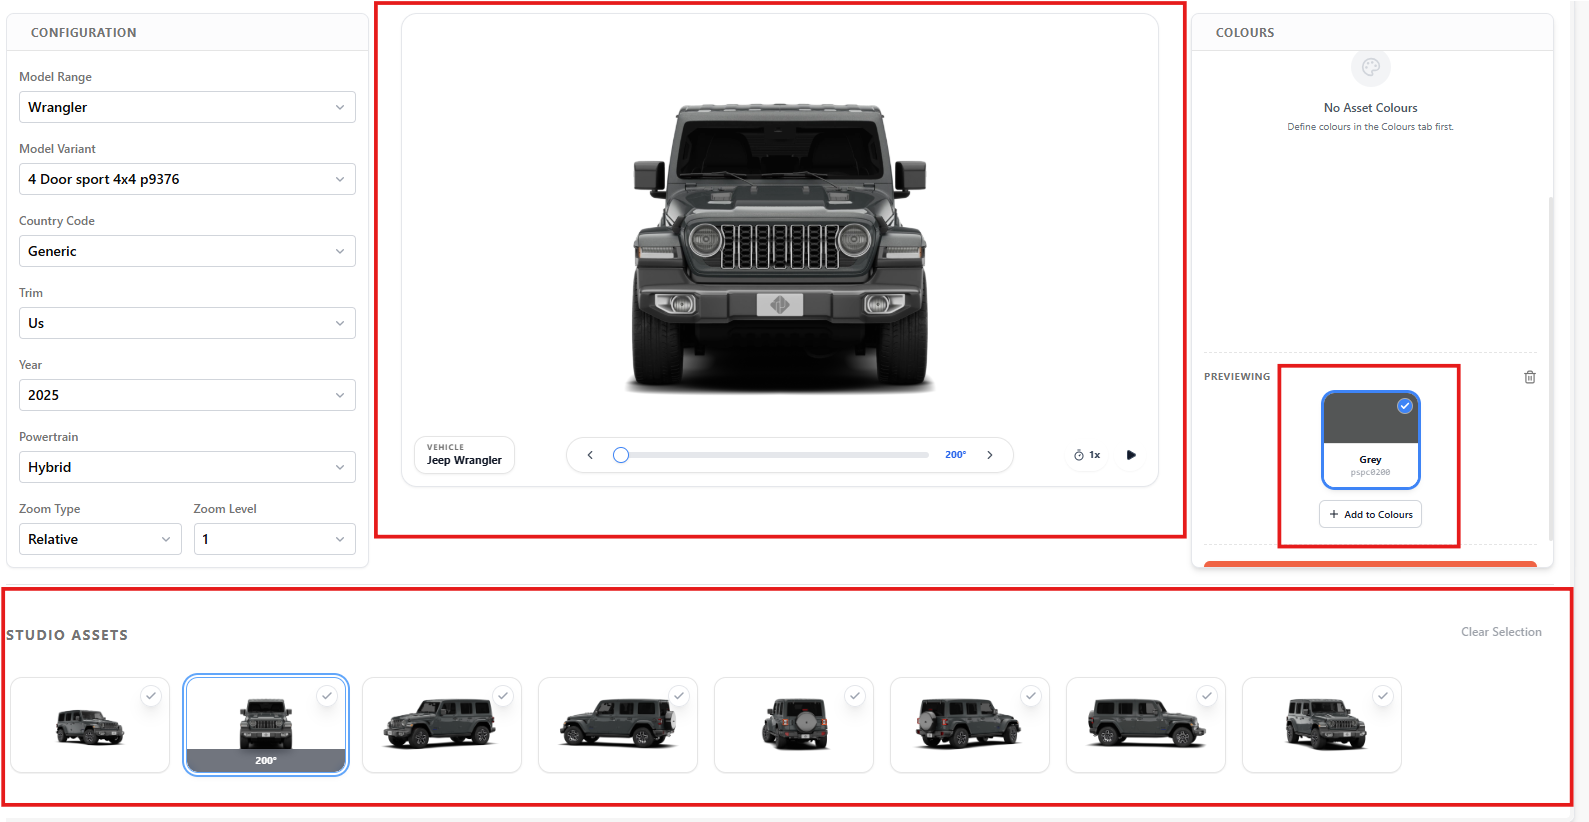
Image Preview and Selection
- There is an asset preview that displays the asset based on the selected configuration and colour.
- Click the play button to view a 360-degree rotation of the asset—the preview updates to reflect the selected colour.
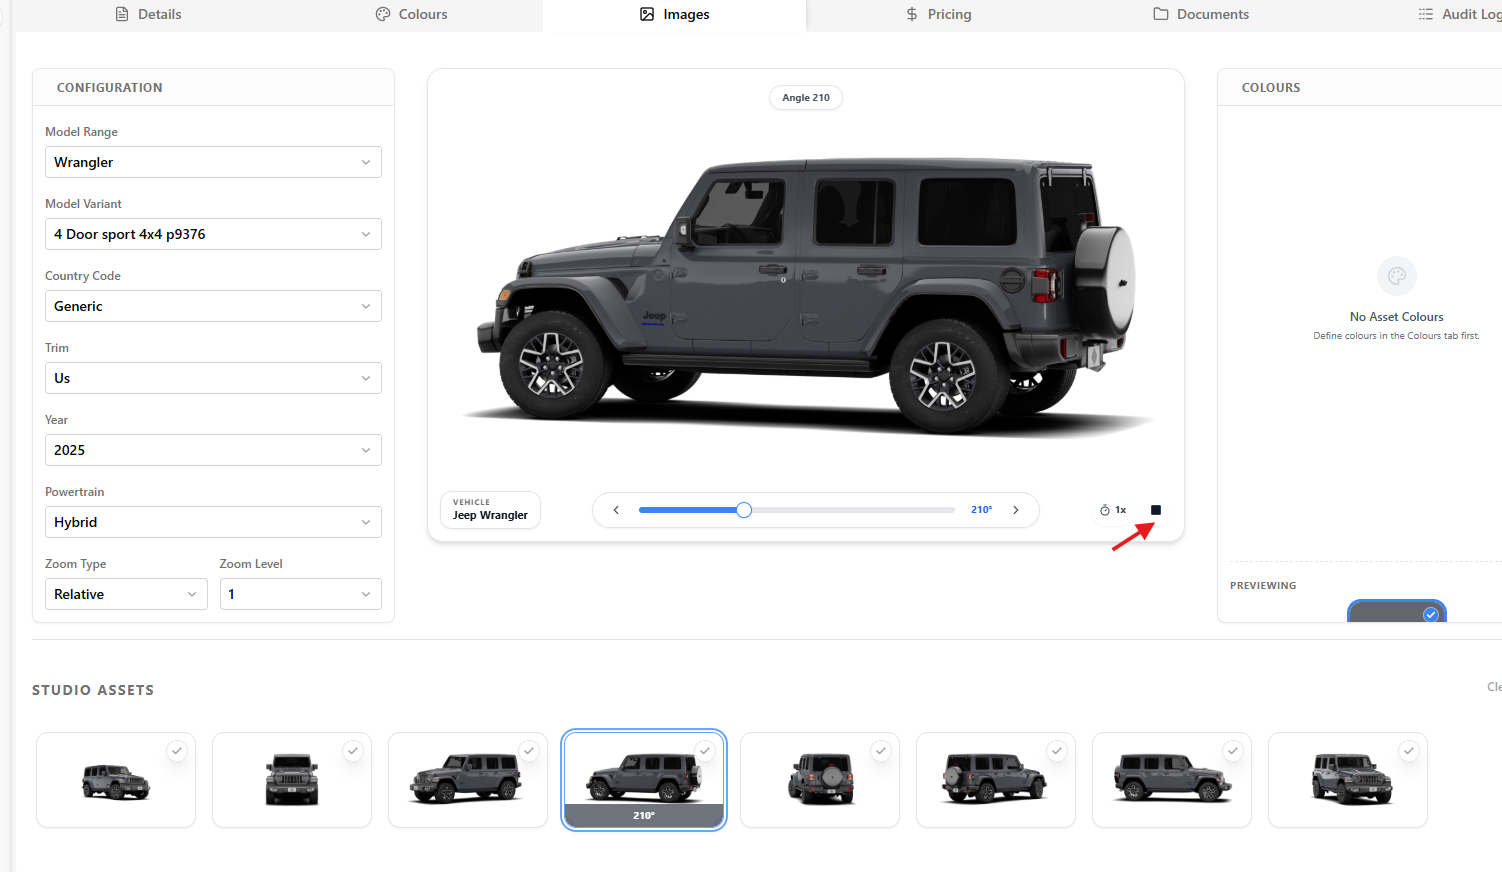
- The Studio Assets section at the bottom displays the available image angles. As the asset rotates, a blue highlight moves across the corresponding image angles.
- Click the stop button in the asset preview to stop the rotation.
Setting a Default Image Angle
You can define which image appears as the default on the website.
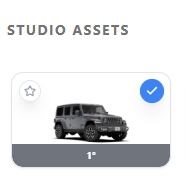
- Navigate to the Studio Assets section in the Image tab and browse through the available image angles.
- Click the transparent check mark in the right corner of your preferred image angle.

- A blue checkmark will appear on the selected image.
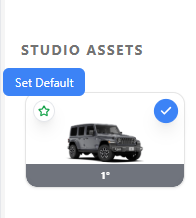
- Click the star icon on the image:
- The star turns green, indicating it is set as the default image.
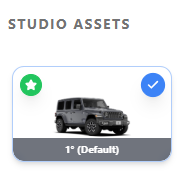
This image will be displayed as the primary asset image on the website.
Selecting Multiple Image Angles
You can select multiple image angles to be displayed to customers when they view an asset on the website.
- Navigate to the Studio Assets section in the Images tab.

- Browse through the available image angles.
- Click on the checkmark icon on an image to select it.

- The checkmark turns blue, indicating that the image angle has been selected.

All selected image angles will be visible to customers when they view the asset during the booking process.
If Required Image Angles Are Not Available
If the available image angles do not meet your requirements, you can share a reference image with TJ Support to request additional angles.
Article by Roshel Jose
Please note:
- The JRNY platform is constantly evolving and new features and functionalities are added all the time. We are constantly updating the Knowledge Base, but some instructions and/or images you see in these articles may vary slightly from what you can see in your own environment. Get in touch with support@tomorrowsjourney.co.uk when in doubt.
- Some features and functionalities may require configurations or additional development to work in your environment. Please speak to us if you have any questions.