
How to add/edit asset properties
Asset properties can be added during or after asset creation. If the platform is subscription-based, these properties may appear on virtual assets. If it is a test-drive platform, it will appear on physical assets.
The steps to add or edit properties to your asset are as follows:
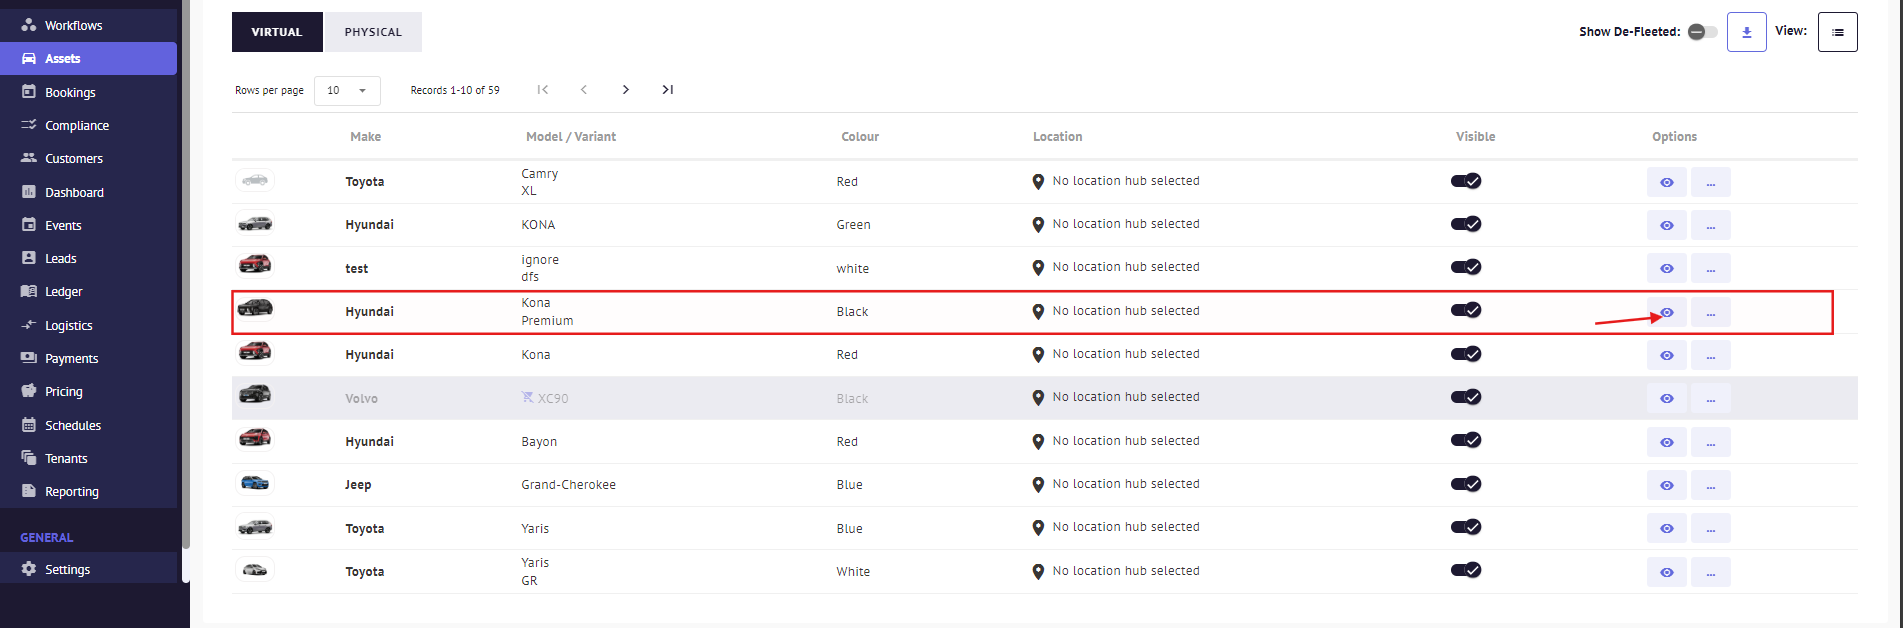
1. Log in to the back office and access the Assets Module. Depending on the platform, i.e. subscription or test drive, choose a virtual or physical asset to add the asset property. Click on the 'view' button to open the Asset Properties Page.
2. Click the edit button and then the "+ Add New" button at the top.

3. Choose the desired property from the list, enter the value, and click "Add". A green confirmation message is highlighted at the bottom of the Asset Property Modal, confirming that the asset property has been successfully added.


- Click anywhere outside the dropdown box and then click "Save" to activate changes.

The asset property has now been included in the asset.
Article by Roshel Jose
Please note:
- The JRNY platform is constantly evolving and new features and functionalities are added all the time. We are constantly updating the Knowledge Base, but some instructions and/or images you see in these articles may vary slightly from what you can see in your own environment. Get in touch with support@tomorrowsjourney.co.uk when in doubt.
- Some features and functionalities may require configurations or additional development to work in your environment. Please speak to us if you have any questions.